
Shower Door Installation Timeline: From Measurement to Install Day
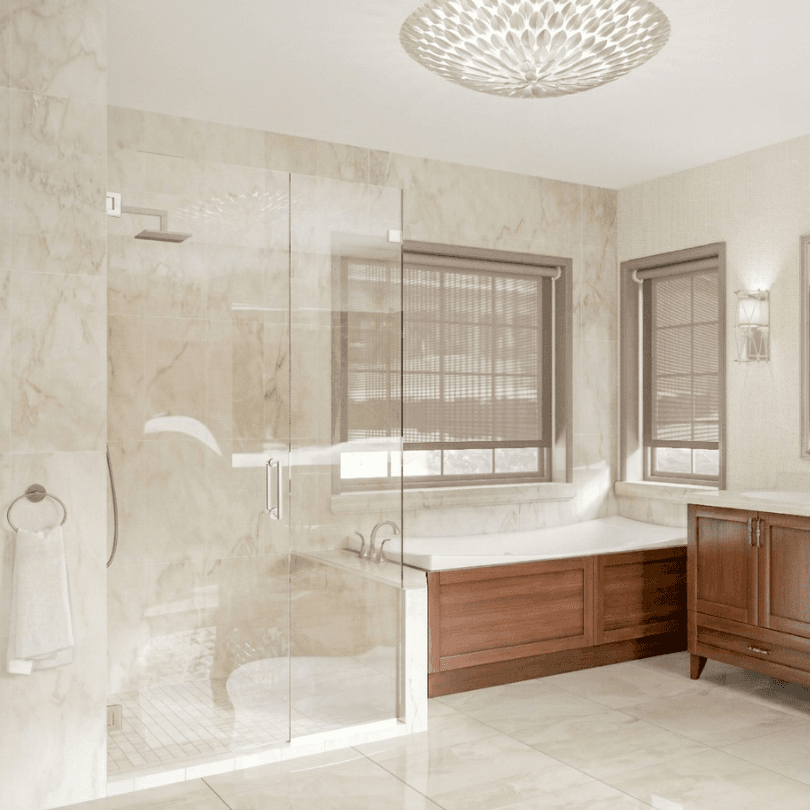
A shower door installation timeline runs about 2 to 4 weeks from the on-site measurement to install day. Install day itself takes 2 to 5 hours for a standard enclosure. The wait in between is fabrication, which typically takes 7 to 14 business days once your glass is ordered.
That is the short version. The longer version matters, because almost every delay in a glass project traces back to something that happened before the glass was ever cut. This guide walks through the entire process in order, from the first phone call to the day you can finally use the shower, and explains what pushes each step.
If you are still choosing a style, our glass shower doors guide covers framing options, glass, and hardware. This page is about what happens after you decide.
Shower Door Installation Timeline at a Glance
| Step | Typical duration | What happens |
|---|---|---|
| Consultation and estimate | Same day to 3 days | Scope, budget, scheduling the measurement |
| Waiting for the shower to be ready | Varies | Tile, grout, and waterproofing must be finished |
| On-site measurement | 45 to 90 minutes | Template the opening, spec the enclosure |
| Approval and deposit | 1 to 3 days | Confirm drawings, glass, hardware, and finish |
| Fabrication | 7 to 14 business days | Cut, notch, drill, edge, temper, coat |
| Scheduling and delivery | 2 to 5 days | Glass arrives, install date confirmed |
| Install day | 2 to 5 hours | Remove old unit, set glass, hardware, seal |
| Silicone cure | About 24 hours | Shower stays dry while the seal sets |
| Total | 2 to 4 weeks | Measurement to first shower |
Custom work stretches this. A steam enclosure, an oversized panel, a specialty finish, or a discontinued hardware match can add one to three weeks.
Step 1: The Consultation and Free Estimate
Everything starts with a conversation about what you have and what you want. Most of this happens by phone or through a quote request, and it takes a few minutes.
What we need to know up front:
- Is this a new shower, a remodel, or a straight replacement of an existing enclosure
- Rough opening size and whether it is a tub, a curbed shower, or a walk-in
- Whether the tile is finished or still being planned
- Which framing style you are leaning toward: frameless, semi-frameless, or sliding
- Your timeline, especially if a contractor is waiting on the glass
Custom shower doors start at $999, though the real number depends on size, glass thickness, hardware, and configuration. Our shower door cost guide breaks down what drives the price.
Step 2: Making Sure the Shower Is Ready to Measure
This is the step that quietly controls the whole schedule, and it is the one homeowners most often get wrong.
Glass gets measured after the tile and grout are finished and cured. Not before. The finished tile surface is what defines the real opening. Measure off bare framing or unfinished walls and the glass will not fit the completed space, and tempered glass cannot be trimmed to make up the difference.
What has to be complete before we come out:
- Waterproofing installed and tested
- All tile set on walls, curb, and floor
- Grout finished and cured
- The curb built to final height and slope
- Shower floor sloped to the drain
- Any niche, bench, or half wall built and tiled
What does not need to be done: plumbing trim, showerhead, valve handles, and the door hardware on your vanity. Those can happen after.
The one thing to handle early
Blocking. Heavy frameless panels transfer all of their weight into the wall through a small number of hinges, so hardware has to anchor into studs or solid wood blocking rather than drywall anchors. If your bathroom is still open at the framing stage, adding blocking behind the future tile costs almost nothing and permanently solves the problem.
If the walls are already closed and tiled, we locate the existing structure during the measurement and lay out hardware around what is actually there. Sometimes that means recommending a different configuration than the one you had in mind.
So the rule is simple: talk to us early, template late.
Step 3: The On-Site Measurement (45 to 90 Minutes)
This is the appointment that decides whether your glass fits. It is not a quick tape measure across the opening.
What actually gets measured
Width and height are checked at multiple points, usually top, middle, and bottom, because openings are rarely the same dimension all the way up. Walls in older Chicago homes drift out of plumb, sometimes by half an inch or more over a shower height. We measure the walls as they actually run and cut to those conditions rather than to a nominal size.
We also check:
- Plumb on both side walls, in both directions
- Level across the curb and along the top of the tub
- Square at the corners for corner and neo-angle enclosures
- Tile lippage, meaning where individual tiles sit proud of their neighbors
- Curb width and slope, since the door has to clear it and the sweep has to seal against it
- Ceiling height for full-height panels and headers
- Where studs and blocking actually sit behind the tile
- Clearance around the vanity, toilet, and door for a swinging panel
Why this cannot be rushed
Tempering puts glass under internal stress. That stress is what makes it strong and what makes it break into small blunt fragments instead of sharp shards. Cut or drill a tempered panel afterward and the whole piece shatters. Every cut, notch, and hinge hole is made before the glass goes through the tempering oven.
The practical result: a panel that comes back a quarter inch off is not something anyone can shave down on site. It has to be refabricated, which restarts the fabrication clock. That is why the measurement gets the time it gets.
Step 4: Decisions Made at the Measurement
By the end of this visit, every spec should be locked. Anything left open here holds up the order.
Configuration
The shape of the enclosure comes first, because it determines panel count, hardware, and clearance.
- Inline single door. One opening across an alcove. The simplest and most common.
- Door with an inline fixed panel. A wider alcove where one panel stays put and the other swings.
- Corner enclosure. Two glass walls meeting at 90 degrees, usually with the door on one side.
- Neo-angle. Three panels across a corner with an angled front. More hardware, more measuring, more cost.
- Return panel. A door with a short panel wrapping the adjacent wall.
- Walk-in fixed panel. A single fixed screen with no door at all. Requires careful showerhead and drain placement.
- Tub screen. A hinged or sliding panel on a tub deck rather than a curb.
- Sliding or bypass. Two panels on a track. The only option when swing clearance does not exist.
Glass thickness
Thickness is a structural decision, not a style preference. Frameless enclosures usually need 3/8 inch or 1/2 inch glass because each panel carries its own weight with no framing to support it. Semi-frameless can run thinner, often 1/4 inch or 3/8 inch, since the perimeter framing takes the edge load. Sliding units typically run 1/4 inch to 3/8 inch.
Panel size pushes the number up. A wide fixed panel may need 1/2 inch where a smaller door in the same bathroom is fine at 3/8 inch.
Glass type
Clear is standard. Low iron removes the green tint you see on the edge of ordinary glass, which matters most on thick panels and light colored tile. Frosted and acid etched add privacy. Rain, reeded, and other patterns add texture and hide water spots. Our post on frosted vs clear vs low iron glass covers how each one looks in a real bathroom.
Protective coating
Applied during fabrication, a coating gives minerals less to grip and makes routine cleaning easier. Water in the Chicago area is hard enough that spotting sets in faster than most people expect. The coating is not permanent and it does not replace a squeegee, but it buys you time. See our post on hard water damage on shower glass.
Hardware and finish
Hinges, handles, clamps, headers, and support bars all come in matching finish families. Chrome, brushed nickel, matte black, brushed gold, and oil rubbed bronze are the common ones. Pick the finish against your existing faucet and vanity hardware, not against a website photo. Our shower door hardware and finish guide goes deeper on matching.
Two hardware choices affect the schedule more than the rest. A specialty or discontinued finish can add a week or more to lead time. And on a wide frameless panel, whether you use a header or a support bar changes the fabrication drawing entirely.
Door swing
Frameless shower doors are usually set to swing outward, and on many configurations they can swing both ways. What matters is clearance. A hinged door needs roughly its own width of open floor. If your vanity or toilet sits close, we will tell you at the measurement, and that is often when a sliding configuration becomes the answer. Our post on shower doors for small bathrooms covers the clearance math.
Edgework
A polished edge is ground flat and smooth, reads clean and modern, and is the standard choice. A beveled edge is cut at an angle around the perimeter, catches light, and gives a more traditional look. Beveling costs more because it takes extra fabrication time. Both are finished so there are no sharp or chipped edges, which is a safety requirement rather than an option.
Seals and sweeps
Bottom sweeps, side seals, and drip rails are what keep water inside a frameless enclosure. They are inexpensive parts that do a large job, and they are the single most common source of a leak once they wear out.
Step 5: Approval and Deposit (1 to 3 Days)
You get the final scope in writing: configuration, dimensions, glass thickness and type, hardware model and finish, edgework, coating, price, and estimated lead time. Review it carefully. This is the last point at which anything can change without cost.
Once the deposit is placed and the order goes to fabrication, the specs are locked. Changing a hinge finish or a panel dimension after that means new glass and a new lead time.
Step 6: Fabrication (7 to 14 Business Days)
This is most of your wait, and none of it happens at your house. Here is the sequence in the shop:
- Cutting. The panel is cut to the template dimensions, including any angles for a neo-angle or a sloped ceiling.
- Notching and drilling. Hinge cutouts, handle holes, and clamp notches are machined. Every hole has to be placed exactly, because none of it can be corrected later.
- Edgework. Edges are ground, then polished or beveled.
- Tempering. The glass goes through the oven. From this moment the panel is finished and unmodifiable.
- Coating. Protective treatment is applied if you ordered it.
- Inspection and crating. The panel is checked against the drawing and packed for transport.
You can read more about how we handle this on our fabrication and installation page.
Step 7: Scheduling and Delivery (2 to 5 Days)
Once glass arrives and passes inspection, we confirm your install date. Most installs are scheduled within a few business days of the glass landing.
If you live in a condo or a building with a management office, this is the point to book the freight elevator and confirm work hours. Buildings that require a certificate of insurance need a few days of notice, and that paperwork has held up more installs than any glass problem ever has.
Step 8: Install Day (2 to 5 Hours)
Here is how the day runs on a standard enclosure.
Protection and old unit removal (30 to 60 minutes)
Floors and the path from the door get covered. If there is an existing enclosure, it comes out: glass first, then hardware, then track and frame. Old silicone gets cut and scraped off the tile.
Removing an old framed unit almost always leaves anchor holes and silicone residue. Those get cleaned and filled. Occasionally a tile is damaged during removal, which is worth knowing before install day rather than during it. Tile repair is not glass work, so if that happens we tell you what was found and you handle it with your tile contractor.
Dry fit and layout (20 to 40 minutes)
Panels are brought in and held in position to confirm the fit before anything gets drilled. Hardware locations are marked against the studs or blocking located at the measurement.
Setting the glass (45 to 90 minutes)
Fixed panels go in first and get leveled and plumbed. Wall channels, clamps, or U channels are anchored. Then the door panel is hung on its hinges and adjusted so it swings evenly and the gap along the fixed panel stays consistent top to bottom.
On a wall that is out of plumb, this is where the extra measuring pays off. The panel was cut to the wall’s real angle, so it lines up rather than showing a wedge shaped gap.
Hardware and door adjustment (20 to 40 minutes)
Handles, towel bars, sweeps, side seals, and drip rails go on. Hinge tension is adjusted so the door holds where it should and closes cleanly.
Sealing (20 to 30 minutes)
Silicone is run at the perimeter where glass meets tile and along the base of fixed panels. Interior joints are sealed to control water, and exterior joints get finished for appearance. Good silicone work is tooled smooth, not smeared, and it is one of the easiest ways to judge an installation.
Cleanup and walkthrough (15 to 30 minutes)
Old glass and packaging leave with the crew. Then we walk the finished shower with you, operate the door, show you the cure time, and go over care. This is the moment to point out anything you are unhappy with, while the installer is still standing there.
Step 9: Silicone Cure (About 24 Hours)
The silicone sealing the perimeter needs time to cure before the enclosure gets wet. Commonly this is about 24 hours, but the exact number depends on the product used and on the temperature and humidity in the room, so we give you a specific figure at the end of the install.
Respect it. A seal that was rushed becomes a leak that shows up weeks later, and by then it is hard to trace back to the cause. Use another bathroom for a day.
Step 10: The First Week
Start the squeegee habit immediately. Wiping the glass after every shower does more than any cleaning product, because it removes water before the minerals in it dry onto the surface.
Use a non-abrasive glass cleaner. Avoid scouring pads, which leave fine scratches that then hold deposits even better than bare glass. Do not use anything with ammonia on a coated panel.
Check the door after a week of use. Hinges occasionally need a small adjustment once everything has settled and the silicone is fully cured. That is normal and it is a five minute fix.
What Actually Causes Delays
Ranked by how often they come up:
- The shower is not ready to measure. Tile unfinished, grout uncured, curb not built. Every day of that is a day the clock has not started.
- Undecided specs. Glass type, hardware finish, or configuration left open at the measurement. Nothing gets ordered until all of it is settled.
- Specialty hardware. An uncommon finish or a discontinued line can add one to three weeks on its own.
- Refabrication. Damage in transit, a shop error, or a spec change after the order. The fabrication clock restarts.
- Changing your mind after the deposit. Tempered glass cannot be modified, so a change means new glass.
- No blocking in the wall. Discovered at the measurement, this can force a configuration change and a redesign.
- Building requirements. Certificates of insurance, elevator reservations, and restricted work hours in condo buildings.
- Contractor sequencing. If the tile contractor slips a week, the glass slips a week.
- Oversized or heavy panels. Some sizes need extra handling, extra crew, and longer lead times.
- Steam enclosures and custom work. Transoms, full height seals, and vapor tight headers all add fabrication complexity.
Timeline by Project Type
Straight replacement of an existing enclosure
The fastest scenario. The opening already exists, tile is finished, and we can measure the day we visit. Expect 2 to 3 weeks from measurement to install. Add time only if the old unit hid a problem behind it.
New shower in a bathroom remodel
Timing depends on your contractor, not on us. We measure after tile and grout are finished, so the glass lead time starts at that point and runs 2 to 4 weeks. Talk to us at the framing stage so blocking goes in, then bring us back at the end.
Custom configuration or oversized panels
Neo-angle enclosures, full height panels, and glass walls need more fabrication time and sometimes more hardware sourcing. Expect 3 to 5 weeks.
Steam shower enclosure
The most involved residential glass job. Transom panels, a vapor tight header, and full perimeter sealing all add complexity. Expect 4 to 6 weeks.
Commercial work
Storefronts, office partitions, gym mirrors, and hotel enclosures carry their own approval steps, building access rules, and volume schedules. These are quoted individually.
Repairs
A worn sweep, a loose hinge, a dragging roller, or a failed seal is often handled in a single visit. A broken panel needs a template and a fabrication run, which puts it back on the 2 to 3 week schedule. See our shower door repair services.
Where Glass Fits in a Bathroom Remodel Schedule
Glass is the last trade in the bathroom. Here is the order that works:
- Framing. Add blocking for future glass hardware. Cheapest insurance in the whole project.
- Rough plumbing and electrical. Showerhead height and valve location get fixed here, and both affect where water lands against the glass.
- Waterproofing. Membrane, pan, and slope to drain.
- Tile and grout. Walls, floor, curb, niche, bench. Then cure.
- Glass measurement. Now the opening is real.
- Fabrication. Meanwhile your contractor finishes paint, vanity, mirror, and trim.
- Glass installation. Last thing in the room.
We work in glass only. Demolition, plumbing, waterproofing, and tile are handled by your contractor, and we come in once the space is finished. If you are managing the project yourself, we will tell you at the measurement exactly what has to be complete before we can fabricate. If you are working with a remodeler, we coordinate with them directly on sequencing so the glass does not hold up the rest of the job.
Preparing for Install Day
- Clear the bathroom completely, including the vanity top and anything on the floor
- Clear a path from your entry door to the bathroom
- Make sure a parking spot is available near the entrance, since glass panels are carried by hand
- Keep pets in another room for the duration
- Plan to use a different bathroom for the rest of the day and overnight
- Have an adult on site who can answer a question and approve anything unexpected
- If you live in a condo, confirm the elevator reservation the day before
What Can Go Wrong and How It Gets Handled
Glass arrives damaged. It happens occasionally in transit. The panel is rejected and refabricated. This is the most common cause of a pushed install date, and it is unavoidable given that the alternative is installing damaged glass.
A tile cracks during old unit removal. Old anchors sometimes sit in tile that is already compromised. We stop, show you what was found, and let you decide before continuing.
The wall has no blocking where hardware needs to go. We lay out around the structure that exists. In rare cases that means a configuration change, and we tell you at the measurement rather than on install day.
Hardware is discontinued on a repair. If an old enclosure uses a hardware line that no longer exists, matching components can be genuinely unavailable. Building a workaround around unobtainable parts tends to fail within months, so we will tell you honestly whether a repair or a replacement is the better call.
The glass panel does not fit. On a properly templated job this should not happen, but when it does the only remedy is refabrication. Tempered glass cannot be trimmed. This is precisely why the measurement gets the time it gets.
Questions to Ask Before You Sign
- Who does the measurement, and who does the installation?
- Is the glass fabricated in house or ordered from a third party?
- What is the lead time in business days, and when does the clock start?
- What has to be finished in my bathroom before you can measure?
- What glass thickness are you specifying and why?
- What happens if the panel comes back wrong, and who pays?
- Is a protective coating included or extra?
- How long before I can use the shower?
- What is the warranty on glass, on hardware, and on labor?
- Do you remove and dispose of my old enclosure?
Timeline and Cost Are Connected
Rushing a glass project rarely saves time and usually costs money. Expedited fabrication carries a premium, and a measurement taken before the tile is finished tends to produce a panel that has to be made twice.
The projects that run fastest are the ones where the bathroom was genuinely ready on measurement day and every spec was decided in that one visit. That is entirely within your control, and it is worth more than any scheduling trick.
Frequently Asked Questions
How long does shower door installation take?
Install day itself takes 2 to 5 hours for a standard enclosure, including removing the old unit, setting the glass, installing hardware, and sealing. The full timeline from measurement to installation is about 2 to 4 weeks, because the glass has to be fabricated after the opening is templated.
Why does custom shower glass take two to four weeks?
Every cut, notch, and hinge hole has to be machined before the glass is tempered, since tempered glass cannot be modified afterward. That fabrication run typically takes 7 to 14 business days, plus a few days each for approval, delivery, and scheduling.
When should the shower be measured during a bathroom remodel?
After the tile and grout are finished and cured. The finished tile surface determines the real opening, and measuring off bare framing produces glass that will not fit. Bring the glass conversation up early though, at the framing stage, because that is when blocking for heavy panels needs to go in.
How soon can I use the shower after installation?
The silicone sealing the perimeter needs time to cure before the enclosure gets wet, commonly about 24 hours. The exact wait depends on the product used and on the temperature and humidity in the room, so we give you a specific number at the end of the install.
Can shower glass be trimmed on site if it does not fit?
No. Tempering puts the glass under internal stress, and cutting or drilling it afterward causes the whole panel to shatter. A panel that comes back off dimension has to be refabricated, which is why the on-site measurement is the most important step in the process.
Do you remove my old shower door?
Yes. Removal of the existing enclosure, cleanup of old silicone and anchor holes, and disposal of the old glass and hardware are part of the installation.
What has to be finished in my bathroom before you can measure?
Waterproofing, all wall and floor tile, the curb built to final height, grout finished and cured, and any niche or bench completed. Plumbing trim and fixtures can be installed after the glass.
What delays a shower door project the most?
A bathroom that is not ready to measure is the most common cause, followed by specs left undecided at the measurement and specialty hardware finishes with long lead times. Damage in transit and changes made after the deposit both restart the fabrication clock.
How long does a shower door repair take compared to a new installation?
A worn sweep, loose hinge, dragging roller, or failed seal is often fixed in a single visit. A broken glass panel needs a new template and a fabrication run, which puts it on the same 2 to 3 week schedule as a new door.
Does a steam shower enclosure take longer to install?
Yes. Steam enclosures need transom panels, a vapor tight header, and full perimeter sealing, which adds fabrication complexity. Expect 4 to 6 weeks from measurement to installation rather than the usual 2 to 4.
Get a Real Date for Your Shower Door
Every number in this guide is a range, because openings are not standard and bathrooms are not ready on the same schedule. The way to get your dates is to have someone come out, look at the opening, and tell you what is actually there.
We have fabricated and installed glass across Chicago and the suburbs for 25 years, and glass is the only trade we work in. Contact us for a free on-site estimate, request a free quote online, or call (708) 808-7775. You can also learn more about our team or browse every